I know a while back I floated the idea of doing some painting guides on the site as a way to make the content available more unique and valuable to others and while I haven’t gotten around to doing it yet, I do have a guide to share with you. I’ve been hard at work making hedges for the Maggot’s Farm scenario and I think it is the kind of scatter terrain that would be useful for anyone gaming in the Shire so I thought I’d share my method for making them. I think they look good and are fairly quick to make so hopefully you find this useful. In the guide, I will list different options to hopefully make it as easy as possible to make hedges and there are optional steps that I recommend to make the terrain look nice but are not necessarily required if you’re pressed for time.
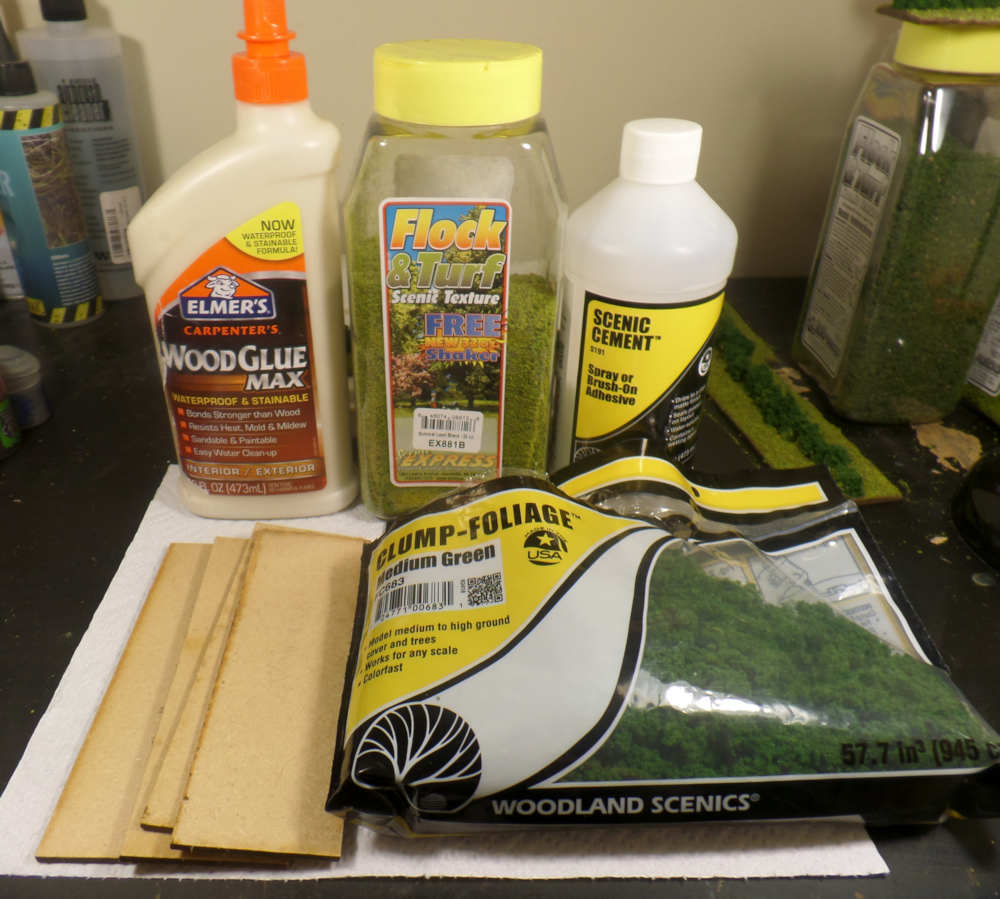
To make hedges, you will the need the following supplies:
- Utility or hobby knife
- PVA Glue (any kind will work, I don’t necessarily recommend the kind in the picture as it is a bit too thick out of the bottle for my taste)
- Multi Base 150mm x 50mm x 3mm MDF bases from Charlie Foxtrot Models
- Woodland Scenics Clump Foliage (I used Medium Green but you can use other colors or shades as desired)
- Woodland Scenics Scenic Cement and a Sprayer (I use the Woodland Scenics sprayer for this as well though any spray bottle will work. If on a budget, you can use 90%/10% Water to PVA Glue ratio instead of Scenic Cement).
- Flock for the base (This should match your board or mat ideally. I used Scenic Express’s Summer Lawn Blend.) You may also want some flock to highlight your clump foliage. More detail on this in step 6 below.
- Brown/Earth colored paint (I use both Vallejo Game Colour Terra Earth and Steel Legion Drab from Games Workshop for my hedges but feel free to use whatever colors you prefer).
Once you have your supplies, here is how to make some great looking hedges:
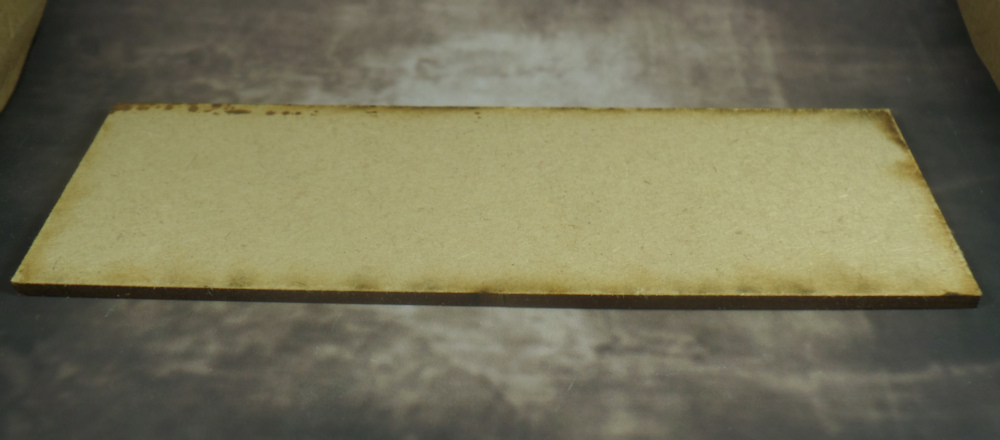
1.) The first step is to bevel your MDF base. This is done by making a 45 degree angle on the horizontal edges of the base with your knife. Make sure to wear a mask to protect yourself from the MDF particles as you do this. I highly recommend this step as it helps make the terrain blend into your table or mat in a natural way. It also makes it less obvious that you’re using a base for terrain. Don’t worry if your cuts are a little rough too. It won’t negatively impact the final product. Just try not to cut the edges of the base too thin as it it could make those spots a little weak.

2.) To help prevent warping with MDF, it is always a good idea to paint the bottom of it to help seal against water. Any cheap brown paint will work. Its not a terrible idea to make it somewhat match the earth color you’re going to paint later. I use Vallejo Game Colour Terra for this because it is cheaper than Games Workshop’s paints and it matches Steel Legion Drab fairly closely. I use Steel Legion Drab for my dirt colors and for my MESBG base rims so I want this terrain to match that. Feel free to use whatever colors you like here.

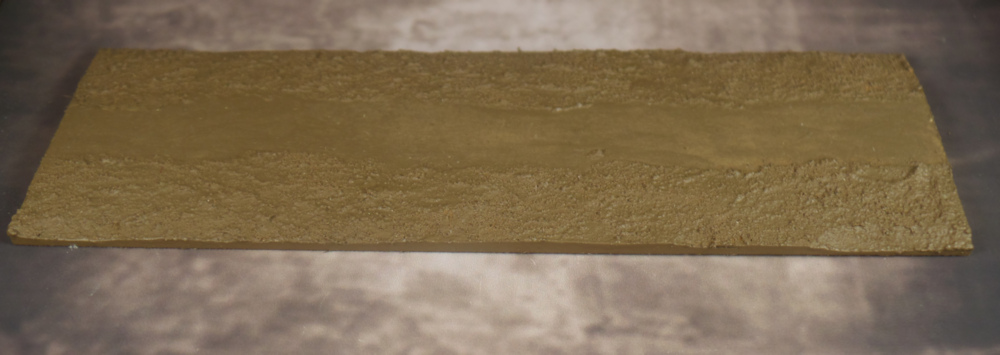
3.) Before moving on with the base, it is probably necessary to help smooth out the beveling you did. I use Vallejo Earth Texture basing paste in a thin layer over everything that I beveled. Make sure the leave the center smooth as you’ll be gluing things there later on. You will want to give the paste 3-4 hours to dry once it is applied. You can see a few spots where it dried and didn’t cover the MDF in the picture below which is totally fine as it will be covered up by flock later on.
Alternatively, if you have the space outside, you can sand down any rough spots in your knife work instead. Again, make sure you have protective equipment so that you don’t breath any particles. I live in a big city and do not have a large outdoor space where I could do something like this so that is why I go the more expensive basing paste route.

4.) Paint the top and sides of the base with whatever earth color you like. I used Steel Legion Drab for this as mentioned above because I want the terrain to match the rest of my MESBG collection but any color can work. Because the dirt will be covered up by flock, I don’t bother using shade and drybrushing the dirt like I would if it was going to be seen. If you want any of the dirt to be showing, I would recommend shading and highlighting the dirt so that it looks nice.
5.) Now it is time to apply clump foliage! I got a big bag of Woodland Scenics and picked out larger pieces of foliage that were stuck together well. You don’t really have to sweat if the pieces are all the same size as variations in size will make the hedges look natural. You may find some small gaps at the bottom as you glue the clump foliage in, these can easily be filled with small pieces of clump foliage as you glue or later once it is has dried. You can also build the height or make the hedges blend more naturally but gluing additional pieces of clump foliage on top. PVA glue takes a while to dry so I recommend giving it 4-6 hours to dry.

6.) This is an optional step but it is pretty quick and easy to do so I recommend it. Drybrush the tops of your clump foliage to highlight it. This will make it look even more realistic and is well worth taking the time to do. Some of the “weaker” or less attached pieces of foliage will fall off the top of the clump foliage during this process which is no problem. Just knock them off the base before the next step.
Alternatively, you can also use lighter colored flock and sprinkle it on top of the hedges and then secure it to the hedges by spraying Scenic Cement. I would recommend letting the terrain dry over night if you use this method so that is the one drawback to this method in my opinion.
7.) Spread PVA glue across the “dirt” on the MDF bases and then add flock. I usually press the flock down into the glue lightly and then knock off the excess. Once that is done, I let it dry overnight as I want to make sure the flock really sticks. Don’t worry about loose flock on top of the clump foliage either. We’ll take care of that in the next step.

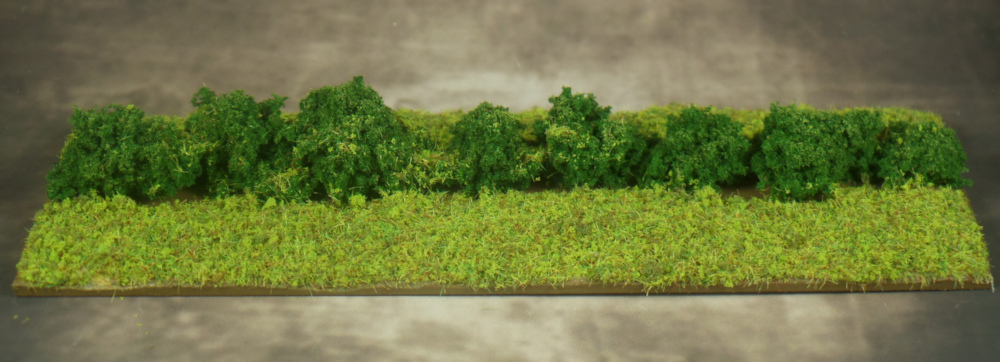
8.) Using a brush, knock off any loose flock on the clump foliage. It is a good idea to lightly tap the terrain to knock off any excess flock that isn’t glued down as well. Using your spray bottle, spray everything with a layer of Scenic Cement/watered down PVA. Let it dry overnight or at least 6-8 hours. I ended up spraying a second time since the clump foliage didn’t feel hard enough (if it feels like pieces might break off, with much pressure, then spray them again). You want everything to be nice and sturdy so it can handle the rigors of the tabletop wargaming. So don’t be afraid to do 2-3 coats of Scenic Cement if need be.
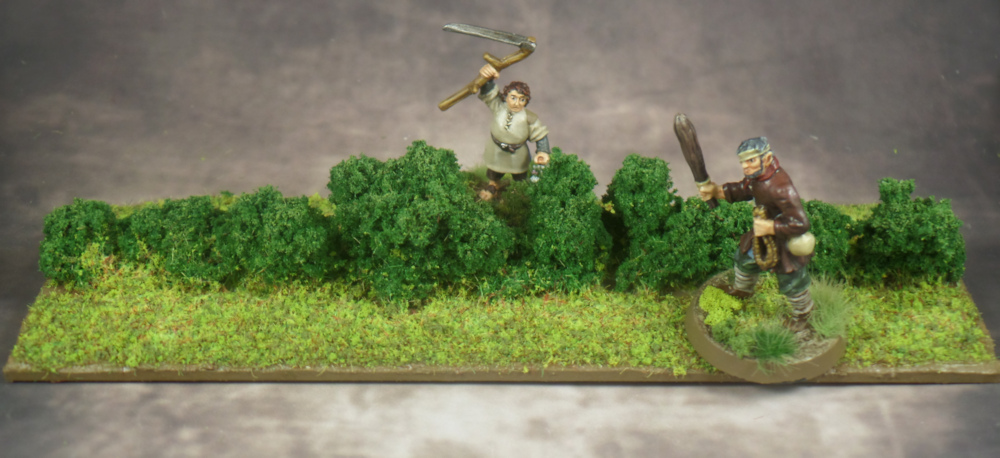
And that’s the final result! A playable but also convincing piece of terrain. The hedge looks like it was grown by hobbits and is not too tall but still looks like a hindrance for any lurking ruffians. I hope you found this guide useful and I hope to share more guides like this in the future!

Great step by step tutorial Kuribo! I often end up at different blogs with tutorials for all kinds of hobbying and am really thankful for all those people taking the time to share their tips and tricks with the world. The hedge came out beautifully and feels very much like something you’d see in the Shire. Those lush green fields, hedges and trees are probably what I love the most about the terrain we play this game on.
LikeLiked by 1 person
Thank you, Gero! It really is nice to give back to the hobby and share knowledge so I’ve been happy to do it. I’m glad you like how the hedges turned out as well. I wanted them to look green and full of life since that is also what I think of when it comes to The Shire. Hopefully, I’ve got a few more guides in me as I had a lot of fun writing this one.
LikeLiked by 1 person
Great job on the hedge. I imagine you’re making plenty more to pretty up the field. Nicely written tutorial as well. Though I would be surprised if 3mm MDF would warp. I got lots of stuff based on that for years and haven’t noticed any. 😀
LikeLiked by 1 person
Thank you as always, Stew! I’ve been busy making quite a few. I’ll be relieved when they’re all finished as you can probably imagine. That’s good to hear about MDF too. I take every precaution after the plasticard I used warped but you’re probably right that it isn’t needed here (especially if you keep your terrain away from water).
LikeLike
Very nice and comprehensive guide! Usually I see a guide on making hedges to be, take a scouring pad and paint it green. Those can be nice too if one takes the time to do it right. (Look up nevinsrip hedges in the one ring) speaking of which, you should put a link to this guide in the terrain section, I’m tired of seeing my packing peanuts as the top one 🙂
LikeLiked by 1 person
Thanks, Bret. Really glad to hear that the guide came out well and I will be happy to post this on One Ring. It was definitely part of my plan, just haven’t had time to get around to it yet 🙂
LikeLike
Kuribo, what I liked about your hedges was the playability of them. It is amazing that one should have more time now but somehow seem to have less. Sorry about the nag on the one-ring but I like to see it have more entries.
LikeLiked by 1 person
I really tried to maximize playability (and make sure these play off the crop terrain I’ve been working on) so I’m glad to hear it. I didn’t think you were nagging either. I was happy to post a link on One Ring, I actually had hoped to do it sooner but you’re exactly right, I’m home all day everyday, I don’t necessarily feel like I’ve had that much more time to hobby unfortunately for me. I’m going to try and make up for it this weekend as best I can 🙂
LikeLike
Nice work on the tutorial! Straightforward instructions and simple enough to do for a lovely looking final result!
LikeLiked by 1 person
Really glad to hear yourself and others liked this guide. It has encouraged me to think about other guides I can write in the future as well.
LikeLiked by 1 person