Rust is tricky to paint and I struggled to learn how to do it early in my painting career. It wasn’t until recently that I finally started getting satisfactory results and I wanted to share how I did it with you. If you’re looking for a way to paint rust in a realistic and convincing fashion, and don’t mind taking a little extra time to do so, then this guide is for you. While I use these techniques on gaming pieces, if you paint strictly to game (and are mostly focused on painting things as fast as humanly possible), you may find the methods I recommend a little slow for your patience level. If that is the case, I will suggest another guide down below that might work better for you (so read on a bit further!). I use this technique for Fallout Wasteland Warfare minis, but it is completely applicable to either Warhammer, MESBG, or any other wargame that you like.
Before I jump into the guide further, I want to plug the Instagram of the person who taught me this technique. @fox_minis is an excellent account to follow if you like Warhammer 40k or AoS at all. Not only is he an excellent bloke and a great hobby friend of mine but he is a highly skilled painter and his work is always inspirational to me. Mentioning him and his Instagram is the least I can do with all of the help he has offered me but I wanted to do something to pay him back. Now let’s talk about painting rust!
Supplies – You’re going to need a few things to paint rust. I do not believe in miracle products that can solve all of your problems, but I strongly believe that you need the right materials to paint rust realistically so I highly encourage you to use what I have listed below to get high quality results.

I know how it sounds, but I am strongly recommending a particular brand of paint because AK Interactive makes the best rust paint I have seen. What makes it great and necessary to own? This paint is oil/enamel paints which let you do things that acrylics cannot. It is easy to adjust and blend the rust paint and clean up any mistakes with them. Acrylics are basically impossible to clean up other than covering them up and trying again which is a pain. Oil/enamel paints do have to be applied AFTER you have varnished your mini which might initially sound like a pain but it also offers you a huge advantage. You can be as sloppy as you need to be with painting the mini and can still easily clean up any stray paint. This may not sound like a big deal but it is a really big advantage and why I strongly recommend this product.
I would suggest getting the light and medium Crusted Rust Deposits and then getting the darker Rust Streaks product as they will allow you to create convincing rust that is not monotone. You will need some white spirit/turpentine but it doesn’t need to be from AK if you prefer something else. I know model car companies make some and I would think that is fine too and certainly easier to find. If you have never worked with oil paints before, you need white spirit to clean your brush after applying the paint (water is basically useless with oil paints in my experience) so it really is a must have.
AK Interactive is a Spanish company and I think their products are easy to get in Europe (though please let me know down below in the comments if I’m wrong on this). They aren’t hard to find in the US but they aren’t as prevalent as say, Vallejo and they can be more expensive. I’d recommend looking on eBay at least initially but also CompetitionMinis.com is a great store in the US with fair prices on AK Interactive. I think I got everything pictured above for around $20-25 including shipping which is very fair.
If for some reason, you feel like you can’t justify getting AK Interactive or oil paints, then I would suggest using the following video by Pete the Wargamer. It is not as realistic (in my opinion) but it lets you use Games Workshop paint to achieve a comparable result. Just know that the method demonstrated there is not forgiving, unlike mine, and if you make a mistake with acrylics, you’ll have to redo those parts/cover them up.

The other supplies that you will need are some styrofoam that has small holes/a bumpy surface, tweezers, an old paintbrush that you don’t care about anymore, and a paper towel or two. The styrofoam is funny in that I can’t tell you a place that is absolutely positive to have it but there are many free places you where you can find it. For example, the styrofoam pictured above came in some railroad terrain I bought to protect the crops. Older blister packs that GW made had styrofoam that would also work. I would guess that the styrofoam that comes with electronics would also work well and that is obviously much larger and would give you a huge supply of it. If you keep your eyes, peeled, you’ll find what you need and I’ve stashed away a couple of pieces myself and have all I need for years of using this technique.

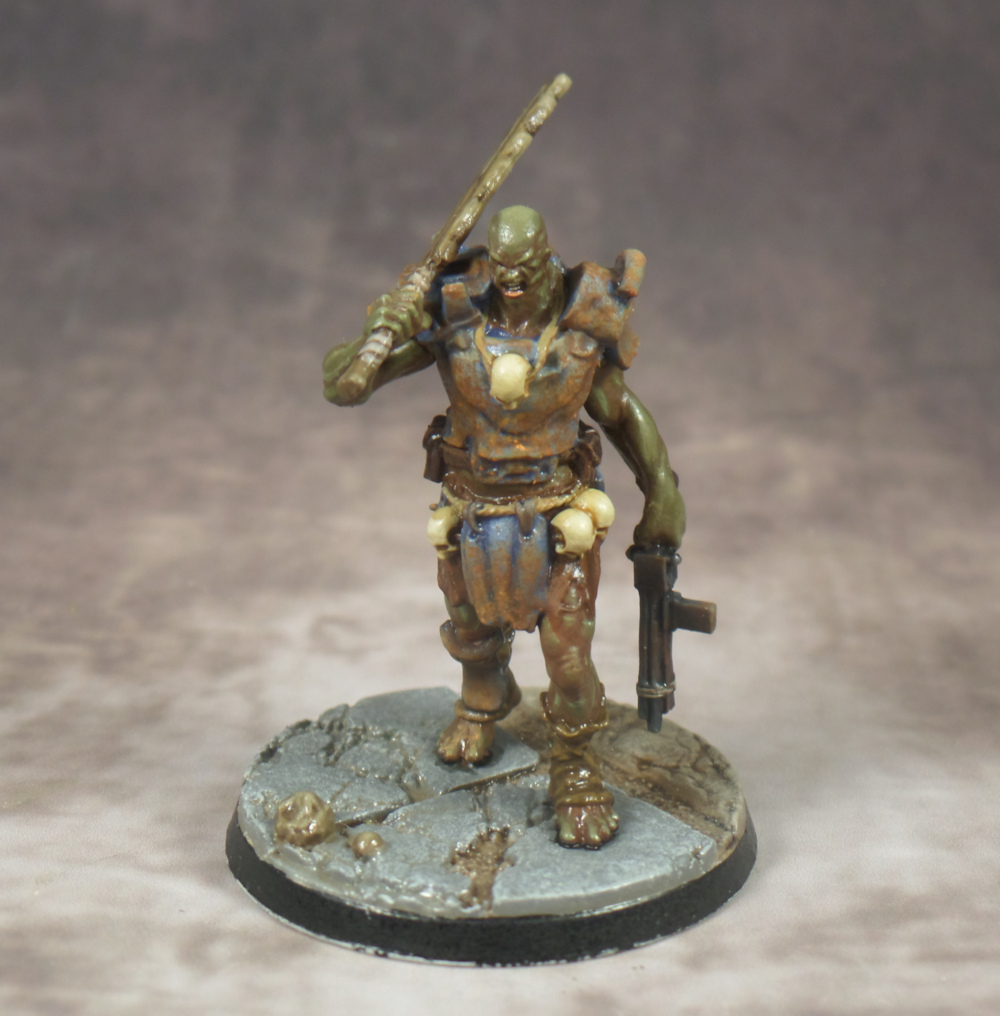
Varnish your model – The “catch” to using oil/enamel paints is that you need to varnish your model to protect the paint job you already applied before applying the oil paints. So basically, paint your miniature up as you normally would and when you’re satisfied, give it a coat of varnish. While you can use rust to cover up mistakes, I would encourage you to get the mini painted up to a good standard because rust looks best in moderation and you don’t want to cover everything you painted with rust. I usually apply a coat of gloss varnish when I’m done painting and then I will go ahead and apply the rust effects and then I’ll finish it with a matte coat. You could do gloss and then matte varnish if you wanted to but it isn’t necessary to do so. As a result of only applying gloss varnish, you’ll notice that I have a very shiny super mutant for many of the pictures in this guide, however, that final matte varnish sorts this out. This initial requirement of having a varnished miniature does take a bit of extra work to do but if you can, I recommend doing varnishing and then painting rust effects in batches. It helps speed up the process a great deal and makes it so you can varnish say 5-20 models at a time which is a better way of doing things whether you’re using a rattlecan or an airbrush to varnish.
Applying rust effects – Now it is time to apply the rust! What you’re going to want to do is pull or cut off a small piece of styrofoam about an inch long. It does not need to be too wide, certainly not wider than your fingers. What you want is for the ends of the styrofoam to be a little rough and to have an irregular pattern. Don’t be afraid to randomly pick off a few bits off the ends of the styroam to make this happen. You will then use tweezers to pick it up and dip into the paints. While you can use your fingers to hold the styrofoam, it is neater with tweezers and you will want to be able to rotate the styrofoam around as you’re applying paint which tweezers can help with.

Starting with your darkest color, the Rust Streaks pictured above, give the paint a good shake and then dip the styrofoam into it lightly. You only need a bit of paint on the end of the styrofoam. I recommend pressing the styrofoam with the paint onto a paper towel 2-3 times to get a majority of the paint off as well. If you’ve ever drybrushed before, it is pretty similar to that. Otherwise, the paint will likely be applied to heavily or you’ll lose the pattern of small “dots” which is what you want. Applying the paint to the paper towel has the side effect of helping you see what the pattern of paint looks like when you apply it to the mini.
Now you’re ready to start dabbing the rust paint onto the mini. I recommend applying it in the places least likely to see wear. For a weapon, you would not want to apply a lot of rust near the sharp part of the blade (since it will be knocked off in combat) and with armor I apply the most rust at the bottom parts. As you’re applying paint, I would recommend rotating the styrofoam so it is applied at different angles so that it looks random as well. One of the biggest problems people who paint rust have is that they don’t apply it in a way to where it looks random and our eyes can tell the rust is not real. I often use both sides of styrofoam (with different patterns) to help keep things looking as random as possible. At this stage, do leave some of the metal parts showing because there are more rust effects to be applied and you don’t want the entire metal surface to be rusted. Also, give the oil paint 30 minutes to an hour to dry completely. I find that the darker rust shows up on the mini immediately and dries quickly and the lighter colors do not but I wanted to mention it here just to be safe.
Also, don’t worry if you accidentally get rust paint on surfaces where it shouldn’t be. That is not a problem at all. Here is what the super mutant looked like after one layer was applied. As you can see, I got pretty sloppy in places applying the rust and there are some small parts to this miniature that were almost impossible not to get some rust paint in places where they shouldn’t be. That is very common when dealing with such small canvasses and yet again, reiterates why this method is so good for painting rust.


Cleaning up any excess rust – This is where the white spirit and our old brush come in handy. Dip your brush into the spirit and then wipe off some of it on the paper towel. Then dab your brush over an area were you accidentally got rust paint on that surface. The paint will lighten and/or disappear because the brush sucks it up. If you then dry the brush off on a towel, it will neatly be placed there. It may take a couple goes at a particular surface if you really hit it hard with rust paint but you can clean up any mistakes this way. You can do this at any time during the process too. I just wanted to mention it early so as to make sure nobody panics if they made a mistake or two. As I’ve mentioned a couple of times, the ability to clean up mistakes like this is truly invaluable and lets you paint the rust effects fearlessly. Just make sure you really look over the miniature, especially at the end to make sure you clean up any and all mistakes. You don’t want those “memorialized” after you apply the final coat of varnish!
Applying medium rust – Now we’re going to apply the second layer of rust only this time we’re going to apply less so that there is still plenty of the dark rust showing. If you think about it (or better yet, Google some photos of rusty metal for reference), there is always more dark rust than there is lighter colored rust. So its important to use less and less rust paint with each highlight. You can continue to use the same styrofoam you have been using or make a new piece to ensure you get different patterns each time. I’ve done both strategies and they both work. The one trick to medium and light rust paints is that they don’t always show up really well until they dry so be patient while applying them. If you can, I’d try dabbing some on and setting it aside for 30 minutes to an hour and then checking to see how it looks and applying more from there. If you apply too much and some rust looks too bright, do not worry, we’ll adjust that later. Here is how my super mutant looks with medium rust applied and some cleaning to make sure there wasn’t rust in places it shouldn’t be as described above. Notice how the medium rust (the lighter color) is applied randomly over and around the darker rust. That is the effect you want.


Applying light rust – You could probably stop after two layers if you’re in a hurry but if you want really top-notch looking rust, especially if you have larger pieces of armor or weapons on the mini, then do apply a bit of light rust too. For the light rust, we want to cover the least amount of space on the model and focus it on the places that would be the least used/most rusted. So again, farthest from the blades on a weapon or the bottom of armor is a good bet. Referencing photos can help you get an idea for this too. A light touch is best here and give the paint time to dry so you can see how it looks and apply more if needed. I’ll talk more about how to adjust any spots that are too bright in just a second but here is a look after the third and final layer has been applied. I forgot to take a picture of the back of the mini unfortunately, but you can see the finished product down below to get an idea of how I applied it there.
Making adjustments – If you have any spots that are too bright like the one near the bottom of his chest piece, this can also be blended with white spirit. If you take your old paintbrush, dip into the white spirit, and then remove most of the white spirit from the paintbrush, you can then apply the small amount of spirit around that area to blend the light color into the others better. It may take two goes to do this for really bright spots but it is easy to adjust, just remember to not have too much white spirit on your brush. Just as a reminder, make sure to clean up any rust paint that was spilled in places where it shouldn’t be. Once that is done and you’re happy with how things look, give the mini a coat of varnish and finish any other things you might need to do like basing and you’re done!

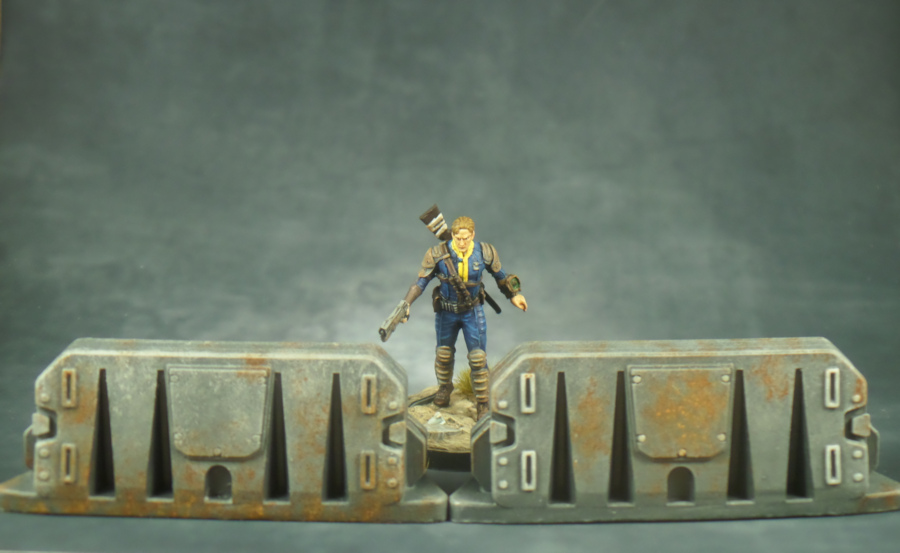

As you can see from the pictures above, the rust effects can really bring miniatures to life and rust is a staple of the Fallout world I’ve creating over the past couple of months. I hope the techniques I showed you are useful and help you with this tricky painting technique. If you use this guide to paint something, I’d love to hear and see how you get on with it. After all, there is nothing more satisfying than knowing you’ve helped others in their hobby journey!

Very handy tutorial! 🙂 I’ve painted with enamels for over half of my life, but now use acrylics for 95% of the painting I do! However, adding rust and streaky dirt I’ve always found easier with enamels, so I still use them for that! Maybe I’m not that much of a dinosaur after all! 😉
LikeLiked by 2 people
Very glad to hear it, John and I certainly don’t think you’re a dinosaur! 🙂 I feel like I’ve only known how to paint with acrylics as that is what most wargamers use but the scale modelers know a lot of good tricks with oil/enamel paints so its worth keeping an eye on what they’re doing too 🙂
LikeLiked by 2 people
Interesting point about using enamels vs acrylics for the clean up aspect – hadn’t thought about that. It makes sense though, will have to look into that more. Another well written post/tutorial, keep them coming!
LikeLiked by 1 person
Really glad to hear this guide was useful and got you thinking, Bret! I have a lot to learn about enamel paints myself and will share any other useful tidbits I find.
LikeLike
Nice post. Like John I am old school in that I started painting years ago with enamal paints and then oils. Acrylics I had to learn and now mostly use but for somethings I still prefer the older methods. Younger painters have only probably known acrylics so this will be more of a revelation I suspect. I like the use of the styrofoam for dabbing and that I will give a try at some point along with other aspects of the technique. As you say always nice to pass on and help others, it’s how we learn after all no matter our ages. Great stuff. 😊
LikeLiked by 1 person
Enamel paints are definitely a revelation for me. I technically used them on model cars but I only basecoated stuff at that time which shows about how much I knew about painting. I’ve pretty much only known acrylics as a serious painter and I have tons to learn about the other paint types.
I’m really glad there was some new info/ideas in the article for you too. I plan on trying to use styrofoam to weather some clothing this week so I’ll share how I get on with that. I have a feeling the technique could be quite useful in a variety of circumstances. I look forward to seeing what you might do with it as well 🙂
LikeLiked by 1 person
(Tried leaving a comment earlier but the internet was being weird).
Nice tutorial and well written. Having written a few tutorials myself I know it can be hard to explain and illustrate the process. I don’t do a lot of rust effects but that’s mainly because it’s hard. Nice to have a guide to rely on when I wish to give it a go. Your rust effects are very nice. 😀
LikeLiked by 1 person
My internet acts up sometimes too. I like to blame COVID for that 😀
I am really glad to hear it is well-written. There were certainly parts that might have been better suited to video but I did the best I could and am glad the written word was good enough for this one. When you decide to work on your post-apocalypse Union army, this guide will be ready and waiting for you 😉
LikeLike
Remembered I was given some eye shadow brushes that I used to dab onto terrain, you might use these for rust with better control than tweezers
LikeLiked by 1 person
Those could work really well and would eliminate the need for tweezers. You might need to rough them up a bit to make the surface more irregular but I think these are a great alternative. I’ll have to see if I can grab some in the near future. Thanks for the suggestion 🙂
LikeLike
Great tutorial, mate – I really enjoyed the read and to see your techniques. 🙂
LikeLiked by 2 people
Really glad to hear it, mate 🙂 It was fun enough to write up but it makes me even happier to hear that others got enjoyment or some use out of it.
LikeLiked by 2 people